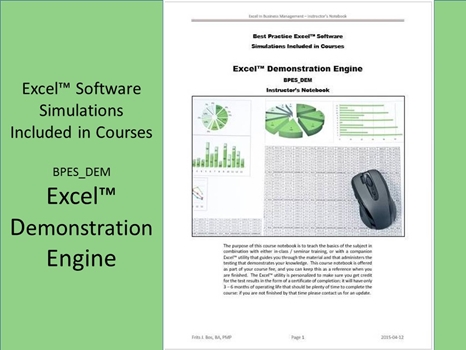
Excel™ Demonstration Engine BPES_DEM
The “Excel™ Demonstration Engine” is a VBA macro designed to execute workbook calculations based on specific case data that may have been produced with the help of the simulation engine or the projection engine. The goal is to be able to recast specific case data, and then to present those data by establishing focus on selected parts of the worksheet (similar in nature to the way you might use PowerPoint). Because we can select different cases we can reflect the results for those individual examples, a great tool for teaching, but also to present the outcome of other simulations to an executive audience after preparing the material for enhanced viewing.
To use the pre-coded engines the student must understand that the code is locked and can only be controlled through data external to the VBA-code itself. This is to stop the code from being corrupted if the wrong code logic is applied. If you want to write custom code we suggest using the VBA training courses that explain the underlying nature of the VBA-code itself, which is a completely different focus from building an Excel™ worksheet application that is based on what the pre-coded engines deliver “out of the box” to make it easier to get started. The engine has the ability to process a full projection engine play-back, if needed.
However, it does not run within the original model worksheet but in a presentation worksheet. The active worksheet is the demonstration worksheet, which has scripts to the right of the playback engine worksheet area (which is a copy of either a simulation or projection worksheet area – the demonstration is able to use the right format). The script selection matches the worksheet columns, so that for each successive script a different worksheet user region gets initialized.
Now we look for the difference from the original engines: in addition to being able to play back in the original worksheet, and then making a copy into the demonstration worksheet to control the process, the playback worksheet engine “script” drives the presentation like PowerPoint on steroids. The script contains commands to make a selection, to highlight a particular area, to put data into a graphic, and above all to present text that explains the model to the client. You write that demonstration script and you can operate manually or allow the script to pause long enough for the audience to see what points you are illustrating. Associated with the script are “slides”: text areas that can copy values straight into the display text to support the presentation. Your “DEMO-xxxx” worksheet will be paired with the “CASE-xxxx” worksheet that holds the original simulation or projection, but that needs the extra columns to store output columns.
The user region of the demonstration engine is an exact replica of a source worksheet (simulation or projection) including the columns reserved for a specific engine type. However, columns to the right of the demonstration engine will contain a script for each of the columns considered for the final presentation. While the original worksheet “CASE-XXXX” is recalculated to reflect the case being demonstrated, we make a copy of the data columns after invoking the Excel™ recalculation, and then we control the use of the data within the demonstration worksheet “DEMO-XXXX” with the script.
The script presents the proper information in individual chunks and either waits for the [RUN] button to be pressed or for a certain time delay to pass (depending on whether AUTORUN is selected). It also has a [Back] button to present a previous slide, if necessary. Since the presentation is using a standard Excel™ worksheet the “slides” can copy data from the actual case so that the information is current, or depending on the case the engine can copy selected data to a separate row on the worksheet if you want to be able to show the differences between cases. To do that the script controls the successive execution of models in the “CASE-xxxx” worksheet. This can get involved, but it is not a complicated situation, and it is a lot easier than to make sure your PowerPoint presentations reflect the latest data.
Similar to “slides” the demonstration worksheet can also hold summary report pages that can be initialized in a similar manner. At the end of a run you can print multi-page reports that may combine elements of each of the analyses you have performed. You can use these report pages also as part of your slideshow.
The original intent of the demonstration engine was to drive applications, in order that the results could be managed in a visual lecture presentation where the operations were explained. Different applications could also be manually selected, after which the presentation could highlight details of what the application did. For example, the initialization of data can be by grouping, so we can show the change in “slow motion” if necessary, which helps students to understand the process.
Basically, the demonstration is setup to grab the “starting image” of the “CASE-xxxx” worksheet, before it invokes the standard simulation (or lets the user execute an application). In the actual presentation scripts we can then copy and overlay portions of the “CASE-xxxx” contents over the original copy in the “DEMO-xxxx” sheet to illustrate a step-by-step change (even though we do not actually step an application). So long as that clearly shows what students should focus on as we explain the process we think the end justifies the means.
Learning Formats BPES_DEM
This course is currently available in a classroom setting (public or company private) with approximately 15 contact hours.
PDF – Certificate Of Completion
Each course offers a certificate of completion that identifies the course, the student, and a brief description of the course. To receive a certificate the student must have attended at least 80% of the course sessions. This personalized certificate is forwarded to the student by Email.
PDF – Course Notebook
Each course includes a notebook in PDF format that provides the minimum knowledge the student must master in order to obtain the certificate. In the notebook you will find references to other study materials. Students receive the notebook by Email when their registration is confirmed.
PDF – Program Overview
An overview of this study program can be downloaded from the website by right-clicking on the program link on the enquiry page.
PDF – Current Training Schedule
A list of upcoming training sessions can be downloaded from the website by right-clicking on the schedule link on the enquiry page.
Registration – Service Providers
To register for any training course please look on the enquiry link page of your service provider (from where you accessed this website). On the page you will find a registration request form where you can order the course that you are interested in. The availability dates will be provided to you, along with payment instructions if you decide to go ahead.